Project Setup
This article mainly covers standard React Native projects. If some steps don't look applicable to your project, please adapt them accordingly, relying on the common sense – look for other file locations, use custom build commands and so on.
If you're using Expo, please refer to the setup guide from their documentation website instead. The setup for Expo projects is different and is not covered in this article.
Step 1: Bootstrap
- React Native
- Native iOS
Out of the box, Detox offers you a first-class integration with Jest, the most popular testing framework for React Native. That's why your first step will be to install or update Jest in your project.
Go to your project's root folder, i.e., where package.json is found, and run:
- npm
- Yarn
- pnpm
npm install "jest@^29" --save-dev
yarn add "jest@^29" --dev
pnpm add "jest@^29" --save-dev
The command above will install the latest supported Jest version. The @^29 override is recommended in the first place to prevent you from getting an outdated Jest version unknowingly, under the influence of package lock files. For example, in React Native boilerplate projects, the package-lock.json is apt to restrict npm install jest to installing an older, unsupported version 26.x.
Now it's time to install Detox itself:
- npm
- Yarn
- pnpm
npm install detox --save-dev
yarn add detox --dev
pnpm add detox --save-dev
Create a package.json in your project's root by running this command:
npm init -y
Remember to add the node_modules folder to your .gitignore file.
Now you are ready to install the Detox itself. Run:
- npm
- Yarn
- pnpm
npm install detox --save-dev
yarn add detox --dev
pnpm add detox --save-dev
The next step is to install a test runner. Out of the box, Detox offers you a first-class integration with Jest, a popular and proven choice in the JavaScript community:
- npm
- Yarn
- pnpm
npm install jest --save-dev
yarn add jest --dev
pnpm add jest --save-dev
If you are not familiar with Jest, we recommend you to read the Jest: Getting Started guide.
Now, when all the dependencies are installed, initialize Detox in your project:
detox init
Normally you should see an output like:
Created a file at path: .detoxrc.js
Created a file at path: e2e/jest.config.js
Created a file at path: e2e/starter.test.js
If you see a message like command not found: detox, make sure you have installed Detox command line tools.
After Detox generated these files in your project's root, you still have some work to do with them:
.detoxrc.js– Detox config file;e2e/jest.config.js– Jest configuration;e2e/starter.test.js– dummy first test.
Step 2: App configs
In this step you need to provide Detox with the right commands to build your app for iOS and Android, and also the right paths to the app binaries so that Detox can install your app on the device before actually starting the tests.
- iOS
- Android
Open your Detox config and replace YOUR_APP placeholder with the actual app name, e.g.:
   apps: {
     'ios.debug': {
       type: 'ios.app',
-      binaryPath: 'ios/build/Build/Products/Debug-iphonesimulator/YOUR_APP.app',
+      binaryPath: 'ios/build/Build/Products/Debug-iphonesimulator/example.app',
-      build: 'xcodebuild -workspace ios/YOUR_APP.xcworkspace -scheme YOUR_APP -configuration Debug -sdk iphonesimulator -derivedDataPath ios/build'
+      build: 'xcodebuild -workspace ios/example.xcworkspace -scheme example -configuration Debug -sdk iphonesimulator -derivedDataPath ios/build'
     },
     'ios.release': {
       type: 'ios.app',
-      binaryPath: 'ios/build/Build/Products/Release-iphonesimulator/YOUR_APP.app',
+      binaryPath: 'ios/build/Build/Products/Release-iphonesimulator/example.app',
-      build: 'xcodebuild -workspace ios/YOUR_APP.xcworkspace -scheme YOUR_APP -configuration Release -sdk iphonesimulator -derivedDataPath ios/build'
+      build: 'xcodebuild -workspace ios/example.xcworkspace -scheme example -configuration Release -sdk iphonesimulator -derivedDataPath ios/build'
     },
If your app uses CocoaPods (all modern React Native projects do since 0.60.0), make sure
to run pod install in your ios/ folder before building with Detox.
If your project doesn't use the pods, then you won't have any YourApp.xcworkspace in your iOS project directory.
You should search instead for something like YourApp.xcodeproj there, and adjust your build command accordingly:
   apps: {
     'ios.debug': {
       type: 'ios.app',
       binaryPath: 'ios/build/Build/Products/Debug-iphonesimulator/example.app',
-      build: 'xcodebuild -workspace ios/YOUR_APP.xcworkspace -scheme YOUR_APP -configuration Debug -sdk iphonesimulator -derivedDataPath ios/build'
+      build: 'xcodebuild -project ios/example.xcodeproj -scheme example -sdk -configuration Debug iphonesimulator -derivedDataPath ios/build'
     },
     'ios.release': {
       type: 'ios.app',
       binaryPath: 'ios/build/Build/Products/Release-iphonesimulator/example.app',
-      build: 'xcodebuild -workspace ios/YOUR_APP.xcworkspace -scheme YOUR_APP -configuration Release -sdk iphonesimulator -derivedDataPath ios/build'
+      build: 'xcodebuild -project ios/example.xcodeproj -scheme example -sdk -configuration Release iphonesimulator -derivedDataPath ios/build'
     },
Check the build and binaryPath attributes for the android.debug and android.release Detox configs:
module.exports = {
  apps: {
    'android.debug': {
      type: 'android.apk',
      build: 'cd android && ./gradlew assembleDebug assembleAndroidTest -DtestBuildType=debug',
      binaryPath: 'android/app/build/outputs/apk/debug/app-debug.apk'
    },
    'android.release': {
      type: 'android.apk',
      build: 'cd android && ./gradlew assembleRelease assembleAndroidTest -DtestBuildType=release',
      binaryPath: 'android/app/build/outputs/apk/release/app-release.apk'
    },
    // ...
  },
  // ...
};
If you have a typical React Native project, these values should already be sufficient and correct.
testBinaryPath
In Android automation testing, there are in fact 2 app binaries involved:
- The app APK, containing your app's code.
- The test APK, containing test code. That includes Detox's native code, Espresso and more.
In some projects, it might make sense for the test APK to be generated over a separate flow, through which is may end up
being put it some custom,
non-default path.
One such example is an optimization where the test APK is prebuilt once and used across multiple app variations. This is
a place where the testBinaryPath attribute can come to the rescue; It can be applied in order to set the custom path
to the test APK explicitly:
module.exports = {
  apps: {
    'android.debug': {
      type: 'android.apk',
      build: 'cd android && ./gradlew assembleDebug assembleAndroidTest -DtestBuildType=debug',
      binaryPath: 'android/app/build/outputs/apk/debug/app-debug.apk',
      testBinaryPath: 'custom/path/to/app-debug-androidTest.apk'
    },
    'android.release': {
      type: 'android.apk',
      binaryPath: 'android/app/build/outputs/apk/release/app-release.apk',
      build: 'cd android && ./gradlew assembleRelease assembleAndroidTest -DtestBuildType=release',
      testBinaryPath: 'custom/path/to/app-release-androidTest.apk'
    },
    // ...
  },
  // ...
};
In the common case, the testBinaryPath attributes is not explicitly required, simply because Detox knows
how to locate it in one of the default paths automatically.
Product flavors
On even more advanced use cases, apps may have additional, custom productFlavors
(for example, driver and passenger flavors of a taxi application). In this case, you should rewrite your apps config,
for both debug and release configurations, according to those flavors, e.g.:
   apps: {
     'driver.android.debug': {
       type: 'android.apk',
-      binaryPath: 'android/app/build/outputs/apk/debug/app-debug.apk',
+      binaryPath: 'android/app/build/outputs/apk/driver/debug/app-driver-debug.apk',
-      build: 'cd android && ./gradlew assembleDebug assembleAndroidTest -DtestBuildType=debug',
+      build: 'cd android && ./gradlew assembleDriverDebug assembleDriverDebugAndroidTest -DtestBuildType=debug',
     },
     'passenger.android.debug': {
       type: 'android.apk',
-      binaryPath: 'android/app/build/outputs/apk/debug/app-debug.apk',
+      binaryPath: 'android/app/build/outputs/apk/passenger/debug/app-passenger-debug.apk',
-      build: 'cd android && ./gradlew assembleDebug assembleAndroidTest -DtestBuildType=debug',
+      build: 'cd android && ./gradlew assemblePassengerDebug assemblePassengerDebugAndroidTest -DtestBuildType=debug',
     },
Step 3: Device configs
By default, Detox config suggests default device types for iOS and Android:
/** @type {Detox.DetoxConfig} */
module.exports = {
  // ...
  devices: {
    simulator: {
      type: 'ios.simulator',
      device: {
        type: 'iPhone 12',
      },
    },
    attached: {
      type: 'android.attached',
      device: {
        adbName: '.*', // any attached device
      },
    },
    emulator: {
      type: 'android.emulator',
      device: {
        avdName: 'Pixel_3a_API_30_x86',
      },
    },
  },
};
If you plan to use cloud devices instead, check out the Genymotion SaaS guide, which will help you to set up remote Android devices. This tutorial, however, focuses on devices running locally.
Here's how you can check they are correct and change them if you need something else:
- iOS
- Android
To check if a specific device type (e.g. iPhone 15) is installed locally, run:
xcrun simctl list devicetypes
If it is available, you'll see it among the other device types in the output:
== Device Types ==
iPhone 4s (com.apple.CoreSimulator.SimDeviceType.iPhone-4s)
iPhone 5 (com.apple.CoreSimulator.SimDeviceType.iPhone-5)
…
iPhone SE (2nd generation) (com.apple.CoreSimulator.SimDeviceType.iPhone-SE--2nd-generation-)
iPhone 12 mini (com.apple.CoreSimulator.SimDeviceType.iPhone-12-mini)
iPhone 15 (com.apple.CoreSimulator.SimDeviceType.iPhone-15)
iPhone 15 Pro (com.apple.CoreSimulator.SimDeviceType.iPhone-15-Pro)
…
If there is no such device type, you can replace it with another from the list:
   simulator: {
     type: 'ios.simulator',
     device: {
-      type: 'iPhone 12',
+      type: 'iPhone 13 Pro',
     },
   },
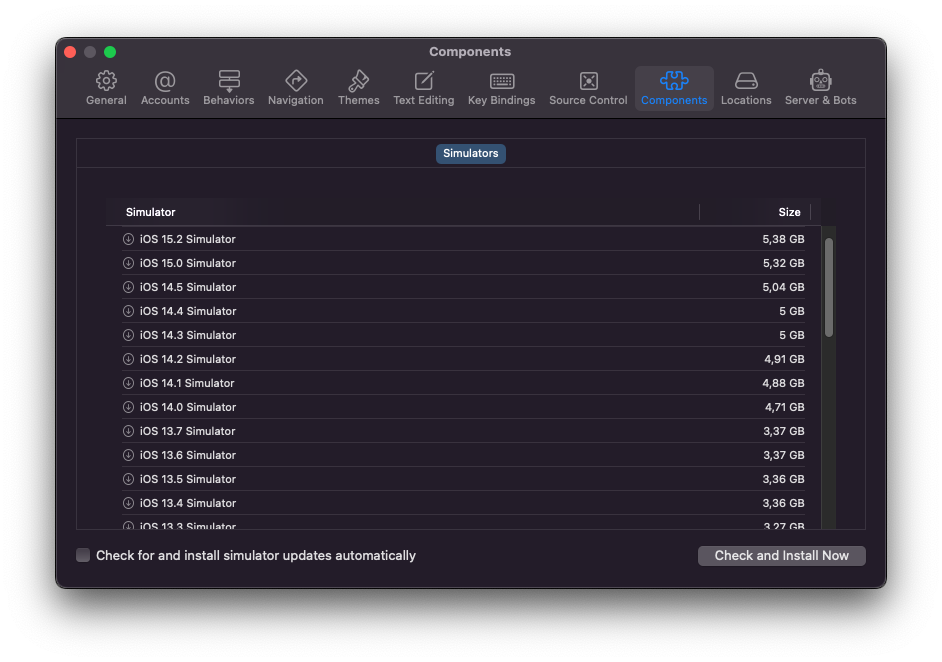
If the device type list is empty or you need a specific iOS version,
go to Xcode > Preferences > Components and install a proper Simulator version from the list:
To check if a specific Android virtual device (e.g. Pixel_3a_API_30_x86) is installed locally, run:
emulator -list-avds
You should see an output like:
Pixel_3a_API_30_x86
Pixel_API_30
If you see zsh: command not found (or a similar message), please go back to
Setting up the environment section
where we were redirecting you to the official React Native CLI Quickstart, and make sure you
have completed it.
Provided you have ANDROID_SDK_ROOT (or ANDROID_HOME) environment variables
defined, using an explicit path to emulator should help:
- MacOS
- Linux
- Windows
$ANDROID_SDK_ROOT/emulator/emulator -list-avds
$ANDROID_SDK_ROOT/emulator/emulator -list-avds
%ANDROID_HOME%\emulator\emulator -list-avds
If you don't see that AVD name, you might use another one from the list – just replace it in Detox config, e.g.:
   emulator: {
     type: 'android.emulator',
     device: {
-      avdName: 'Pixel_3a_API_30_x86',
+      avdName: 'Pixel_API_30',
     },
   },
If the output is completely blank, then you need to open Android Studio and create a new virtual device (AVD)
first. Experienced users might do that via avdmanager, if Android Studio is not installed (e.g. on CI).
If you wish to use an attached Android device (via USB or wireless network), make sure it is available:
adb devices
If the device is properly connected, you should get an output like this:
List of devices attached
2F6315NVPH      device
Assuming the device is available (troubleshooting adb issues is out of scope of this tutorial), you just
need to use android.att.* Detox configurations instead of android.emu.* where required.
⚠️ If you have multiple devices connected, replace that loose regular expression (adbName: '.*')
in your Detox config with a specific device name.
Step 4: Additional Android configuration
If you want to try out your tests right away on iOS, you can skip to Step 5: Build the app and revisit it when you're ready to move forward with Android.
Assuming you have a regular React Native project, these are the files you normally would need to patch or create if they are missing:
- Build scripts:
android/build.gradleandroid/app/build.gradle
- Native test code:
android/app/src/androidTest/java/com/<your.package>/DetoxTest.java
- Manifests:
android/app/src/main/AndroidManifest.xmlandroid/app/src/main/res/xml/network_security_config.xml
4.1. Patching build scripts
Open your main build script and apply the suggested changes:
New Android projects won't have an allprojects {} section, so you will need to add it yourself.
 buildscript {
   ext {
     buildToolsVersion = "31.0.0"
     minSdkVersion = 21 // (1)
     compileSdkVersion = 30
     targetSdkVersion = 30
+    kotlinVersion = 'X.Y.Z' // (2)
   }
 …
   dependencies {
     classpath("com.android.tools.build:gradle:7.1.1")
     classpath("com.facebook.react:react-native-gradle-plugin")
     classpath("de.undercouch:gradle-download-task:5.0.1")
+    classpath("org.jetbrains.kotlin:kotlin-gradle-plugin:$kotlinVersion") // (3)
 …

 allprojects {
   repositories {
     …
     google()
+    maven { // (4)
+      url("$rootDir/../node_modules/detox/Detox-android")
+    }
     maven { url 'https://www.jitpack.io' }
   }
 }
Here is the explanation of those changes, numbered 1-4:
- Make sure your
minSdkVersionis at least 18 or higher. - We recommend you to define a global
kotlinVersionconstant you would use in the next step. ReplaceX.Y.Zwith the actual version number. To get one, open Android Studio, go toPreferences > Languages & Frameworks > Kotlinand look atCurrent Kotlin plugin versionfield. For example,211-1.5.30-release-408-AS7442.40means you have version1.5.30.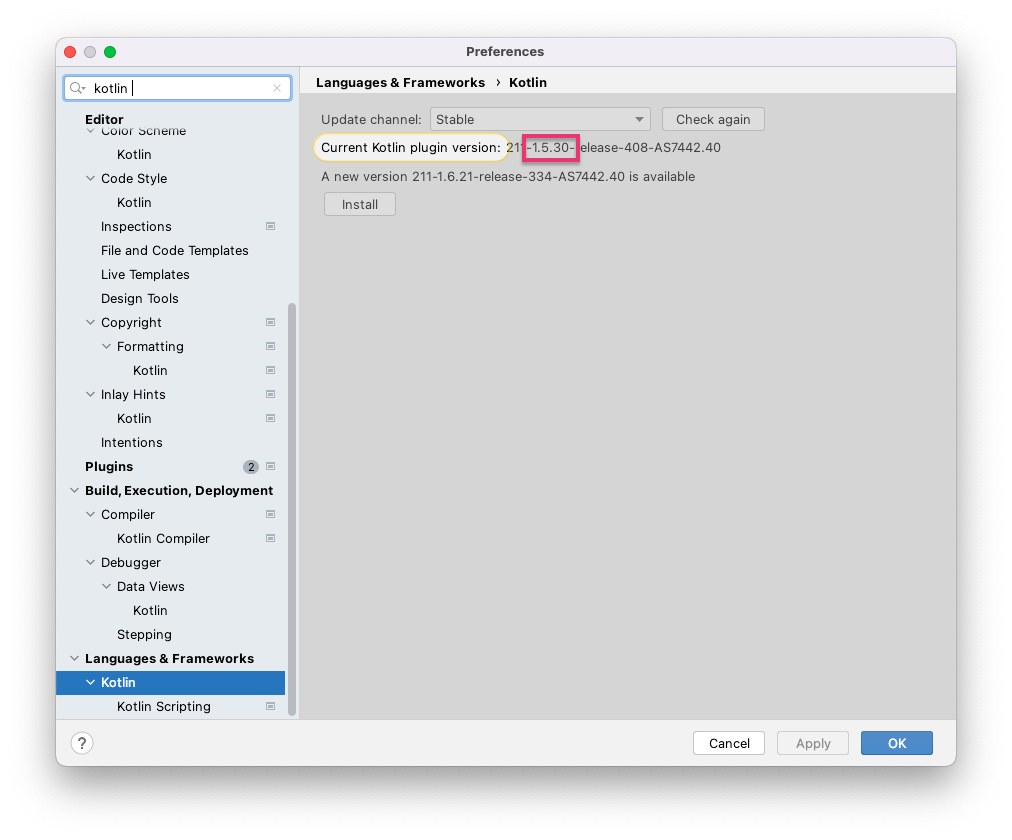
- The line adds Kotlin Gradle plugin to the build script. If your project is not entirely new, there's a chance you might have it already, so make sure you aren't adding it twice. 😉
- Last, we add Detox as a precompiled native dependency,
.aar. If you need to have Detox as a compiling dependency instead, consult the respective section in Debugging guide.
Now let's move on to the next build script and prepare it:
 …

 android {
   …
   defaultConfig {
     …
     versionCode 1
     versionName "1.0"
+    testBuildType System.getProperty('testBuildType', 'debug')
+    testInstrumentationRunner 'androidx.test.runner.AndroidJUnitRunner'
   …
   buildTypes {
     release {
       minifyEnabled true
       proguardFiles getDefaultProguardFile('proguard-android.txt'), 'proguard-rules.pro'
+      proguardFile "${rootProject.projectDir}/../node_modules/detox/android/detox/proguard-rules-app.pro"

       signingConfig signingConfigs.release
     }
   }
   …

 dependencies {
+  androidTestImplementation('com.wix:detox:+')
+  implementation 'androidx.appcompat:appcompat:1.1.0'
   implementation fileTree(dir: "libs", include: ["*.jar"])
Detox relies on Android Reflection API to integrate with React Native on Android, that's why you have to exempt some of its native code from ProGuard minification. Otherwise, you'll see Detox crashing or hanging up infinitely upon an attempt to run tests with your app built in release mode.
4.2. Adding an auxiliary Android test
Detox requires that your project has a single dummy native Android test with some special content,
which will be picked up by testRunner that you just added in the previous step, so let's create it now.
Copy the snippet below to create a file under the following path (where <your.package> is your actual
package name):
package com.<your.package>; // (1)

import com.wix.detox.Detox;
import com.wix.detox.config.DetoxConfig;

import org.junit.Rule;
import org.junit.Test;
import org.junit.runner.RunWith;

import androidx.test.ext.junit.runners.AndroidJUnit4;
import androidx.test.filters.LargeTest;
import androidx.test.rule.ActivityTestRule;

@RunWith(AndroidJUnit4.class)
@LargeTest
public class DetoxTest {
    @Rule // (2)
    public ActivityTestRule<MainActivity> mActivityRule = new ActivityTestRule<>(MainActivity.class, false, false);

    @Test
    public void runDetoxTests() {
        DetoxConfig detoxConfig = new DetoxConfig();
        detoxConfig.idlePolicyConfig.masterTimeoutSec = 90;
        detoxConfig.idlePolicyConfig.idleResourceTimeoutSec = 60;
        detoxConfig.rnContextLoadTimeoutSec = (BuildConfig.DEBUG ? 180 : 60);

        Detox.runTests(mActivityRule, detoxConfig);
    }
}
You can see there are two lines (1 and 18) that require extra care:
- Replace with your package name. To look it up, you could copy and paste the first line from
android/app/src/main/java/com/<your.package>/MainActivity.java. - Usually not the case, but you might have a custom activity name instead of a default
MainActivity. To check whether it is so or not, open yourandroid/app/src/main/AndroidManifest.xml, and check what your main activity is called:
…
  <activity
    android:name=".MainActivity"
    android:label="@string/app_name"
    android:launchMode="standard"
4.3. Enabling unencrypted traffic for Detox
For Detox to work, its native code running on Android device has to be able to connect to the Node.js host running tests.
It sends an unencrypted HTTP traffic via virtual localhost interface, that's why you need to create a new file which
adds a couple of exceptions to the security rules.
If properly configured, this approach in no way compromises the security settings of your app. For more details, refer to Android’s security-config guide and the dedicated article in the Android developers blog.
Create a new network security config file for Android (or patch it if you have one):
<?xml version="1.0" encoding="utf-8"?>
<network-security-config>
    <domain-config cleartextTrafficPermitted="true">
        <domain includeSubdomains="true">10.0.2.2</domain>
        <domain includeSubdomains="true">localhost</domain>
    </domain-config>
</network-security-config>
If you had no network security config before, it means you also have to register it after creation:
 <manifest>
   <application
   …
+    android:networkSecurityConfig="@xml/network_security_config">
   </application>
 </manifest>
🏆 Pat yourself on the back! The hardest part is over, now your Android app is ready to be used with Detox.
Step 5: Build the app
- iOS (Debug)
- iOS (Release)
- Android (Debug)
- Android (Release)
detox build --configuration ios.sim.debug
detox build --configuration ios.sim.release
detox build --configuration android.emu.debug
detox build --configuration android.emu.release
If the build is failing, try out our Troubleshooting section.
Note that Detox CLI just executes the build command you specified in your Detox config (.detoxrc.js)
for a specific configuration. In the other words, it has no extra logic – it just takes the command and runs it,
nothing more and nothing less.
Once your build is ready to use, please proceed to the next article.